AnimalBuster Part 4 - Using Project Variables
Overview
You will build an interactive VR shooting game using XRCC in this tutorial. Please go through all of the preceeding parts of the Animal Buster tutorial series before continuing with this tutorial.
This tutorial will provide a gentle introduction to project variables and demonstrate how they can be used in your XRCC projects.
What is a Project Variable?
A project variable differs from an ordinary variable in that it belongs to the project itself. Meaning, modifications made to project variables will persist even after a scene change. Although project variables do not keep their values after you exit the current project or XRCC.
In this tutorial, we will be implementing a high score system keeping track of the least number of shots needed to kill the bunny for each level.
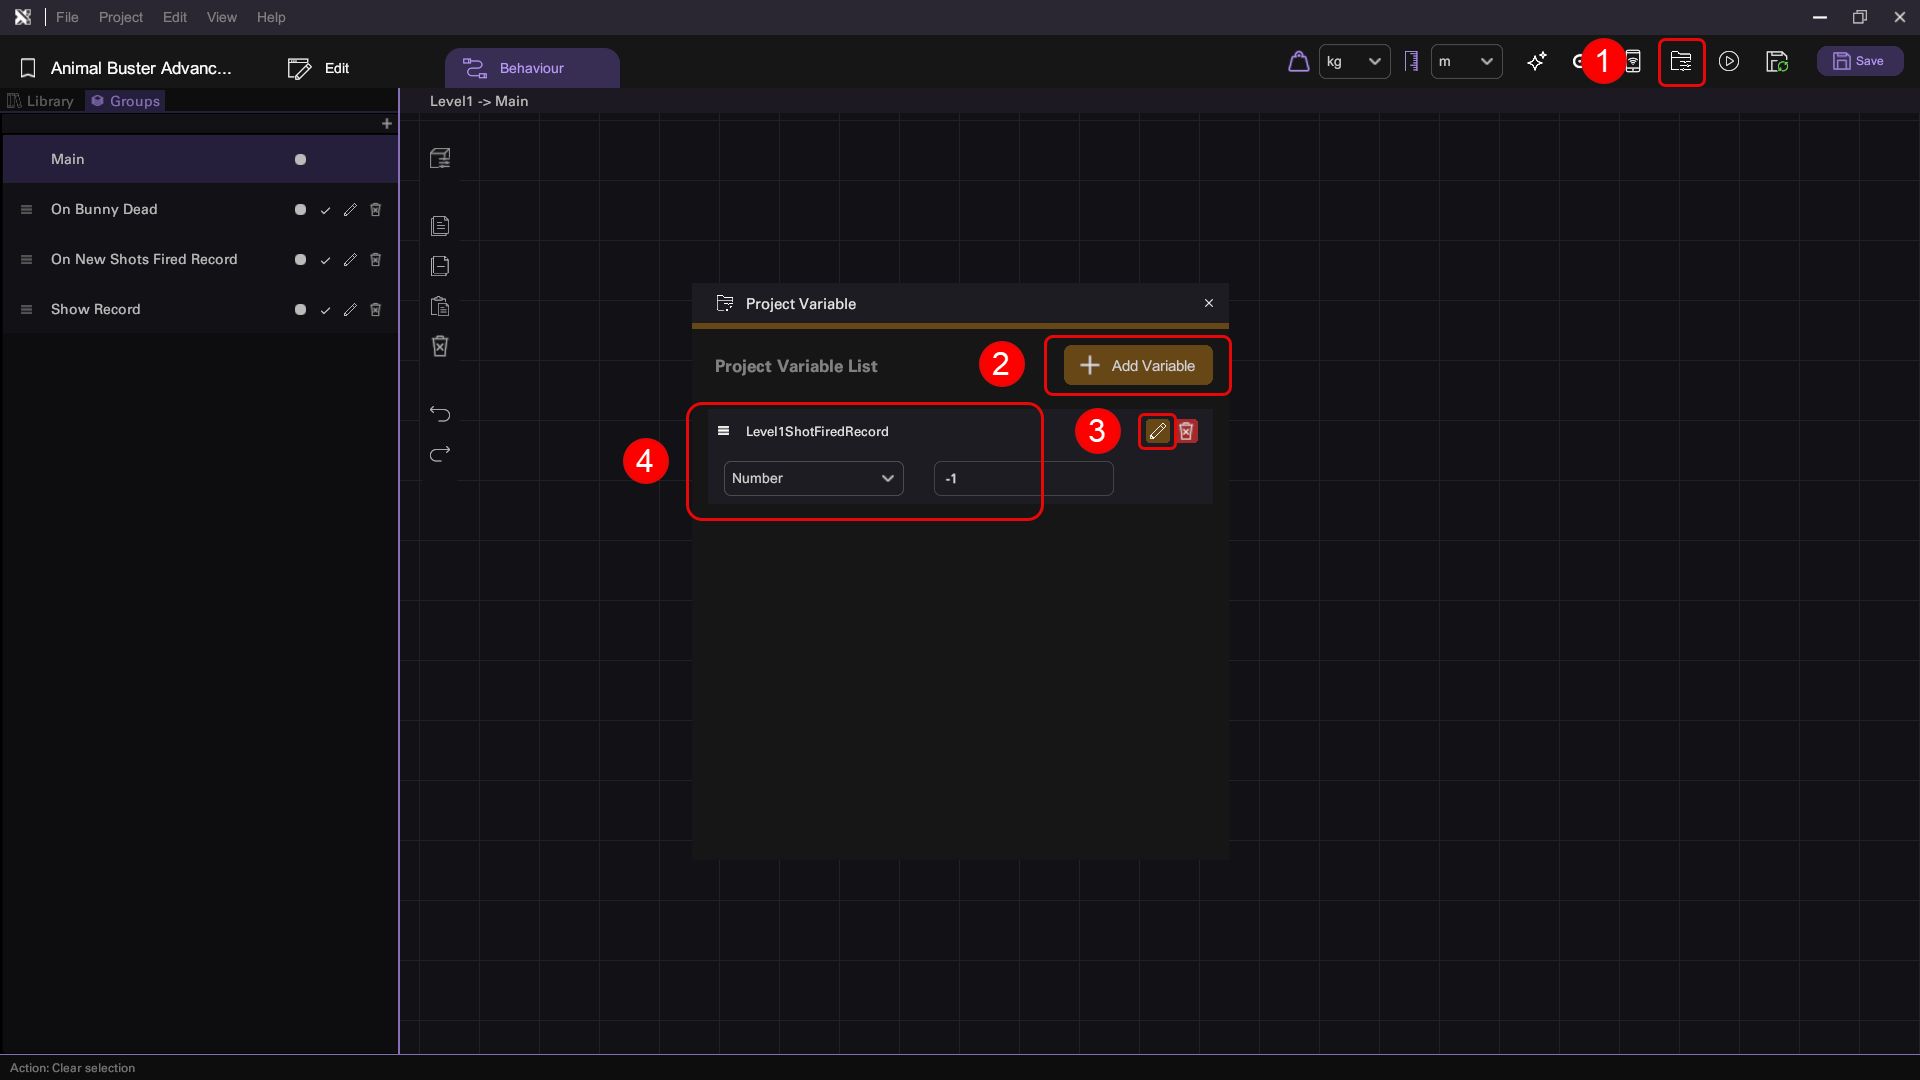
Step 1: Create a project variable
- Open the Behaviour Tab:
- Select the project variable icon to open the project variable panel.
- Create the project variable:
- Click the "Add Variable" button to create a new variable.
- Name the variable: "Level1ShotFiredRecord"
- Set the variable type to "Number" and its default value to -1.
Step 2: Keep track of the number of shots fired
-
Create the Shots fired variable:
- Select the Slingshot Pad and open the behaviour tab.
- Create a new variable (Not a project variable!) of type Number with a default value of 0, and name it "Shots fired".
-
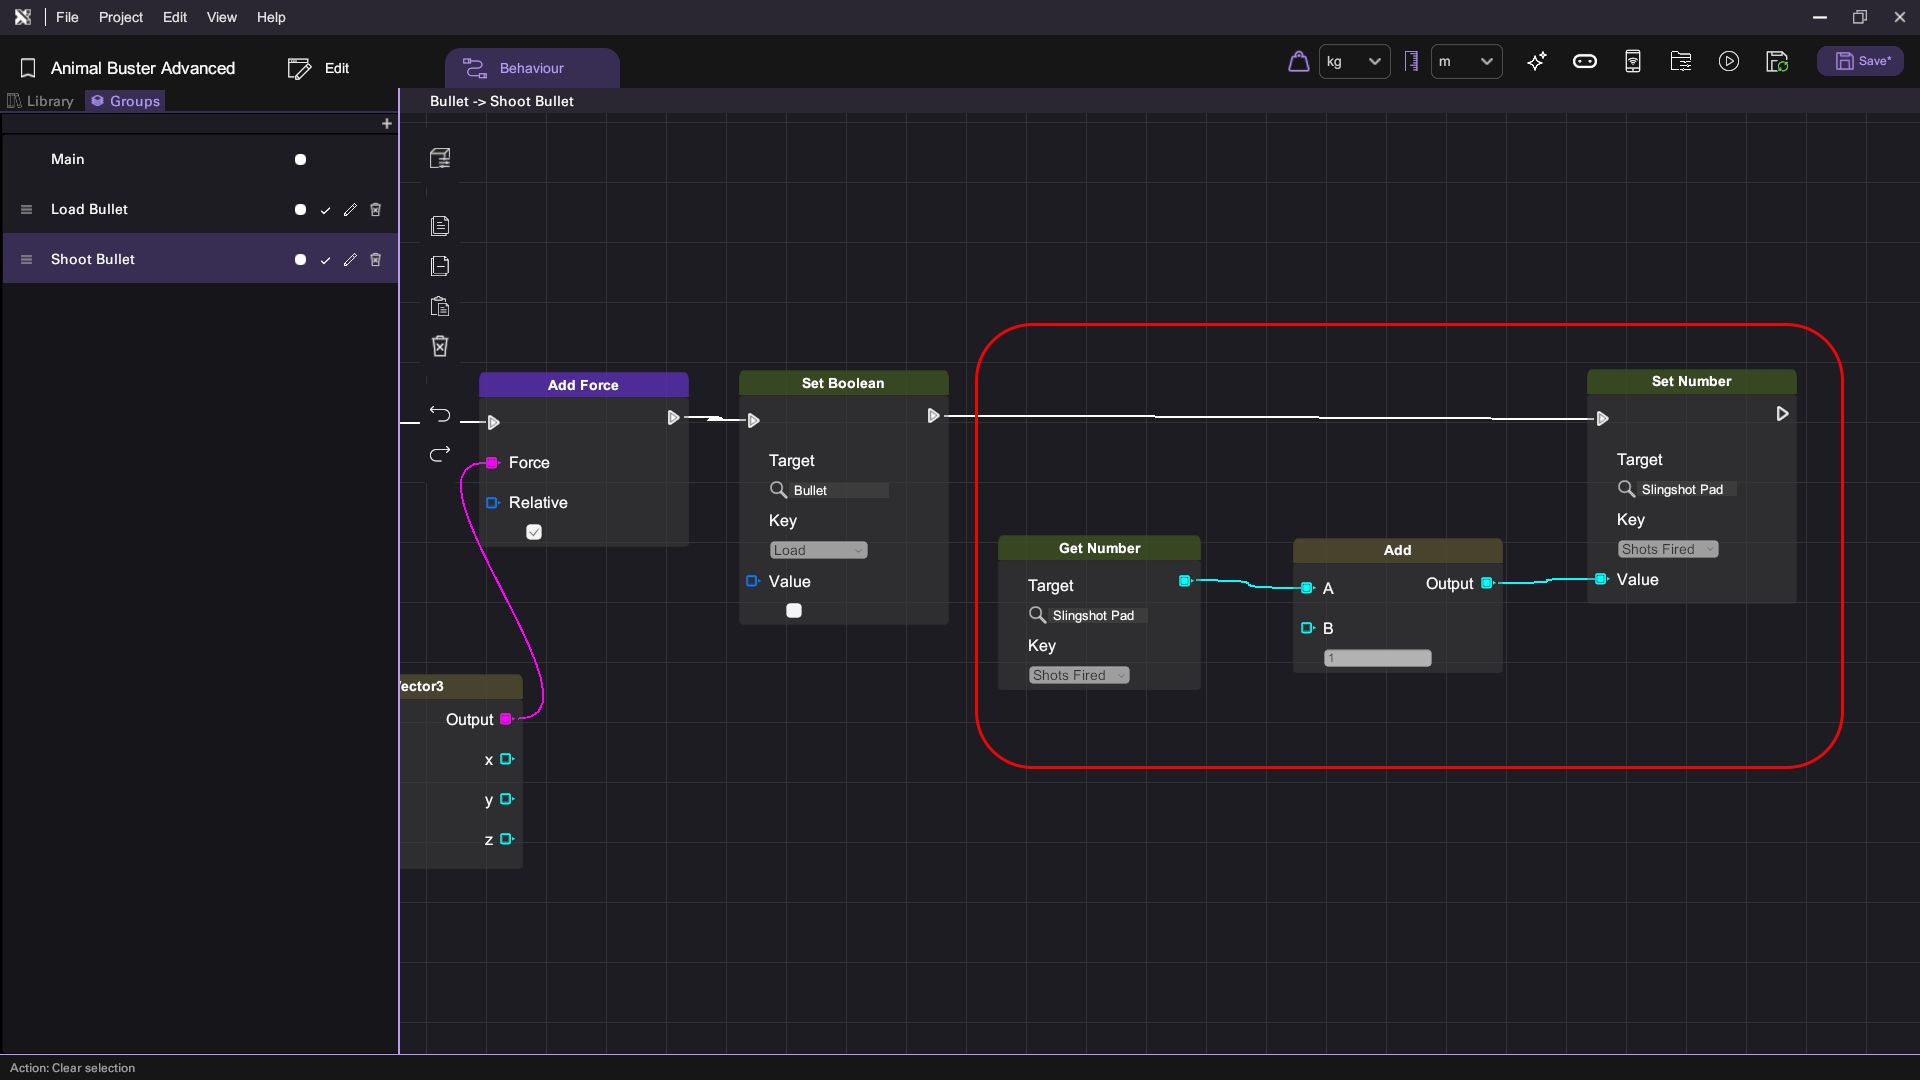
Create the logic that updates the Shots fired variable:
We only want to increment the Shots fired variable inside the Slingshot Pad object if and only if the sling shot was released with a bullet loaded in it.
- Select the Bullet object and open the behaviour tab.
- Go to the groups tab and select the Shoot Bullet action.
- Update the behaviour graph as seen below by adding the highlighted nodes after the Set boolean proceeding the Add Force node.
Step 3: Create "Shots Fired" Record Displayer
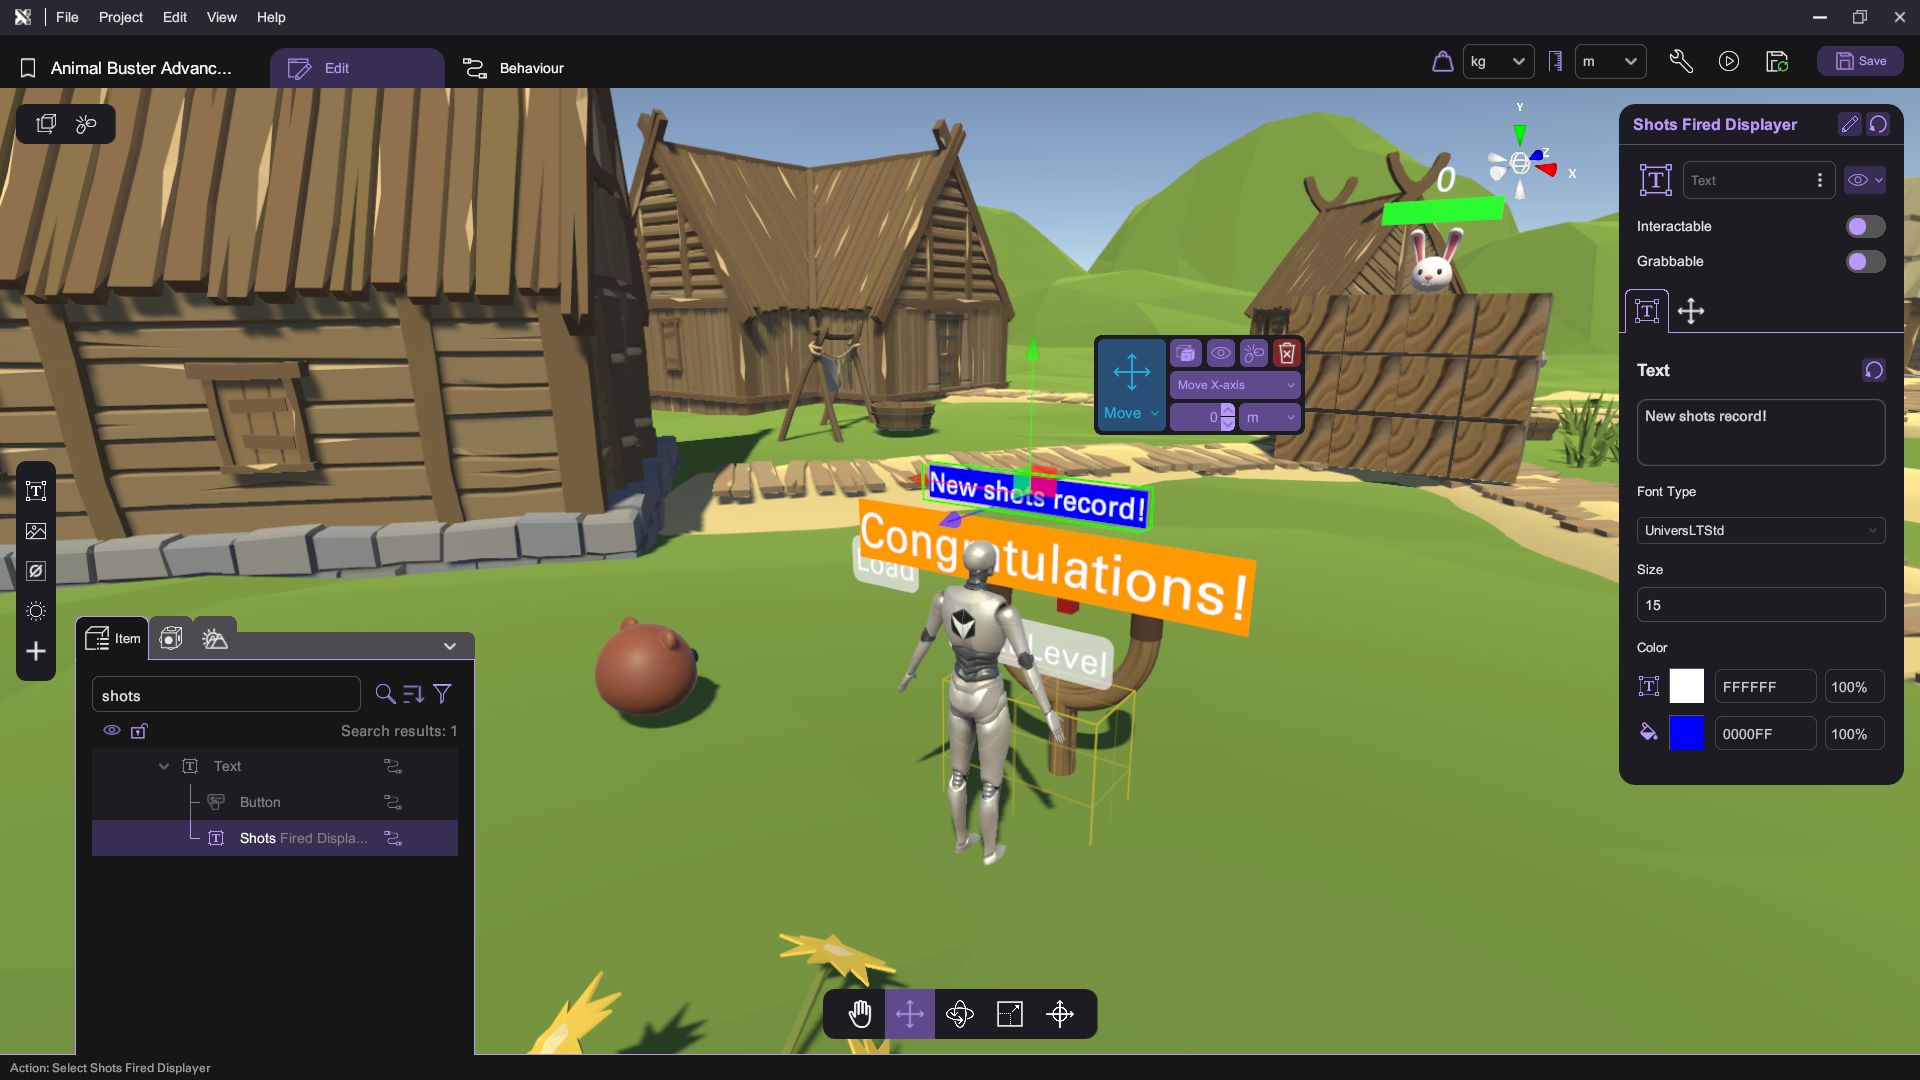
- Open the Asset Panel:
- Spawn a Text object.
- Name it "Shots Fired Displayer"
- Set Text Attributes:
- Link the Shots Fired Displayer to the Text object displaying the word: "Congratulations"
- Set the position of the displayer to 0, 3.5, 0.
- Set the rotation of the displayer to 0, 0, 0.
- Give the displayer a placeholder sentence, such as: "New shots record!"
- Set the background color of the displayer to a color of your choice.
-
Create an Action for When the Player Sets a New Record:
- Select the Shots Fired Displayer object and open the behaviour tab.
- Go to the Groups tab and create a new action with the name: Show new shots record.
- When the player sets a new record, we will have the displayer display the number of shots fired reported by the slingshot pad as shown below.
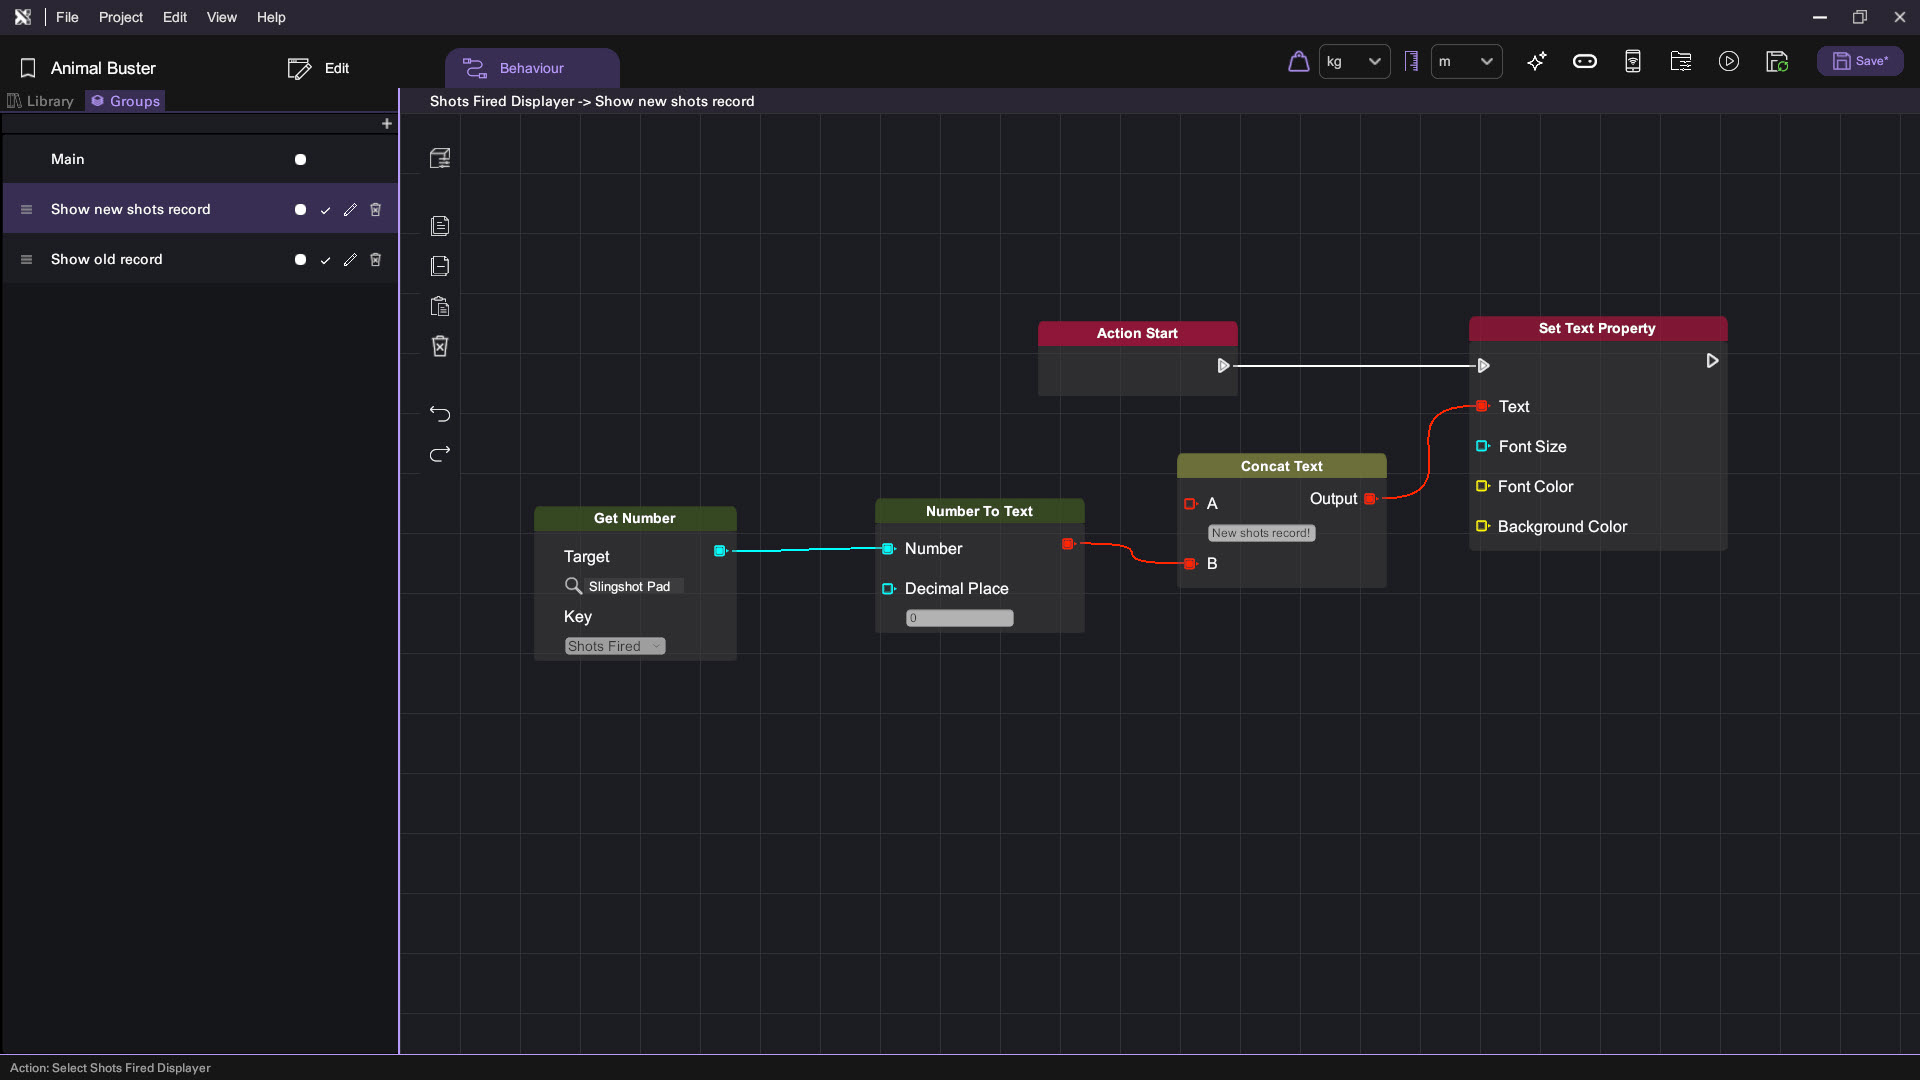
Note that the text for input A in the Concat Text node is: "New shots record! Number of shots: ".
-
Create an Action for When the Player fails to set a New Record:
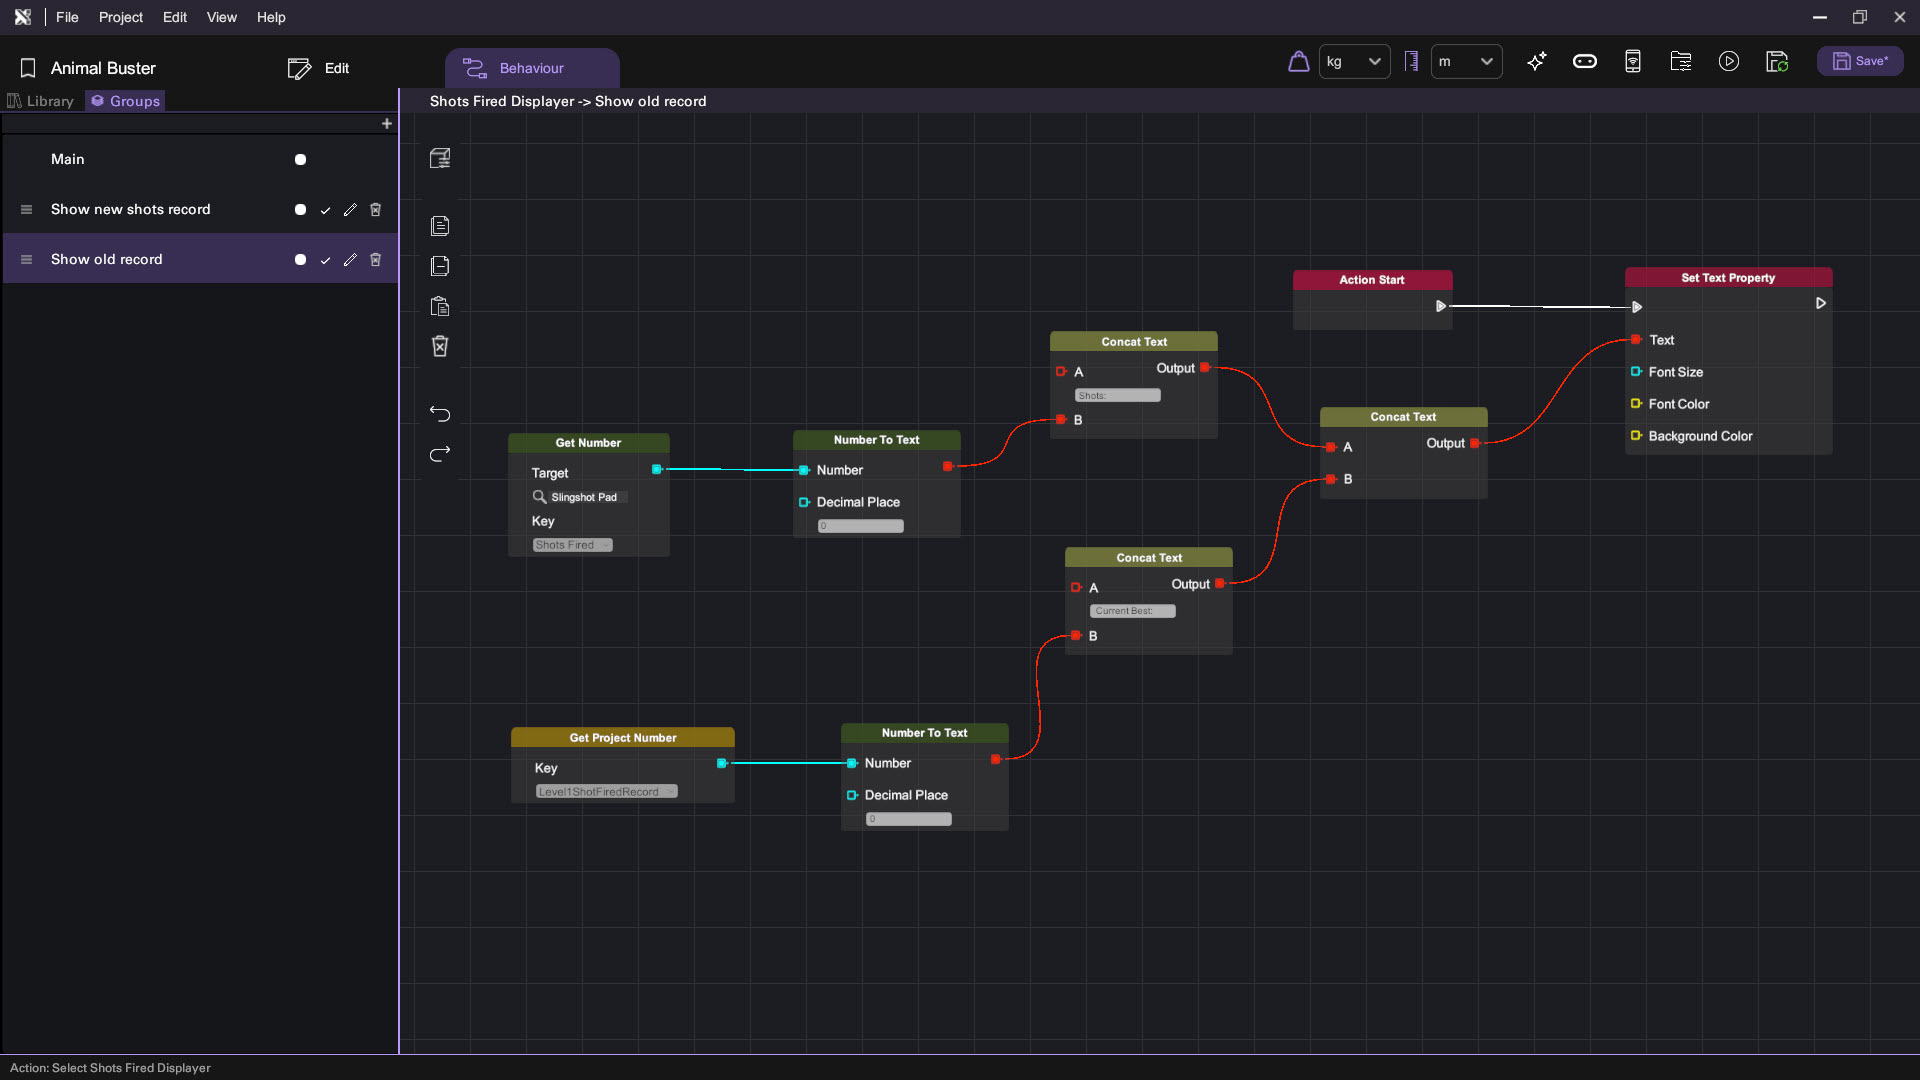
- Go to the Groups tab and create a new action with the name: Show old record.
- When the player kills the bunny but fails to set a new record, we will display both the number of shots fired and the current record held in the project variable created in step 1. An example implementation is shown below.
| Category | Behaviour |
|---|---|
 |  |
Step 4: Modify logic for When Bunny is Killed
- Create an action to be triggered when the bunny is killed:
- Will nothing selected, go to the behaviour tab.
- In the groups tab, create a new action with the name On Bunny Dead.
- Create two other actions that would be called when the On Bunny Dead action is called:
- On New Shots Fired Record: Action to be called if a new record had been achieved.
- Show Record: Action to be called otherwise.
- Below is a sample implementation of the On Bunny Dead action.
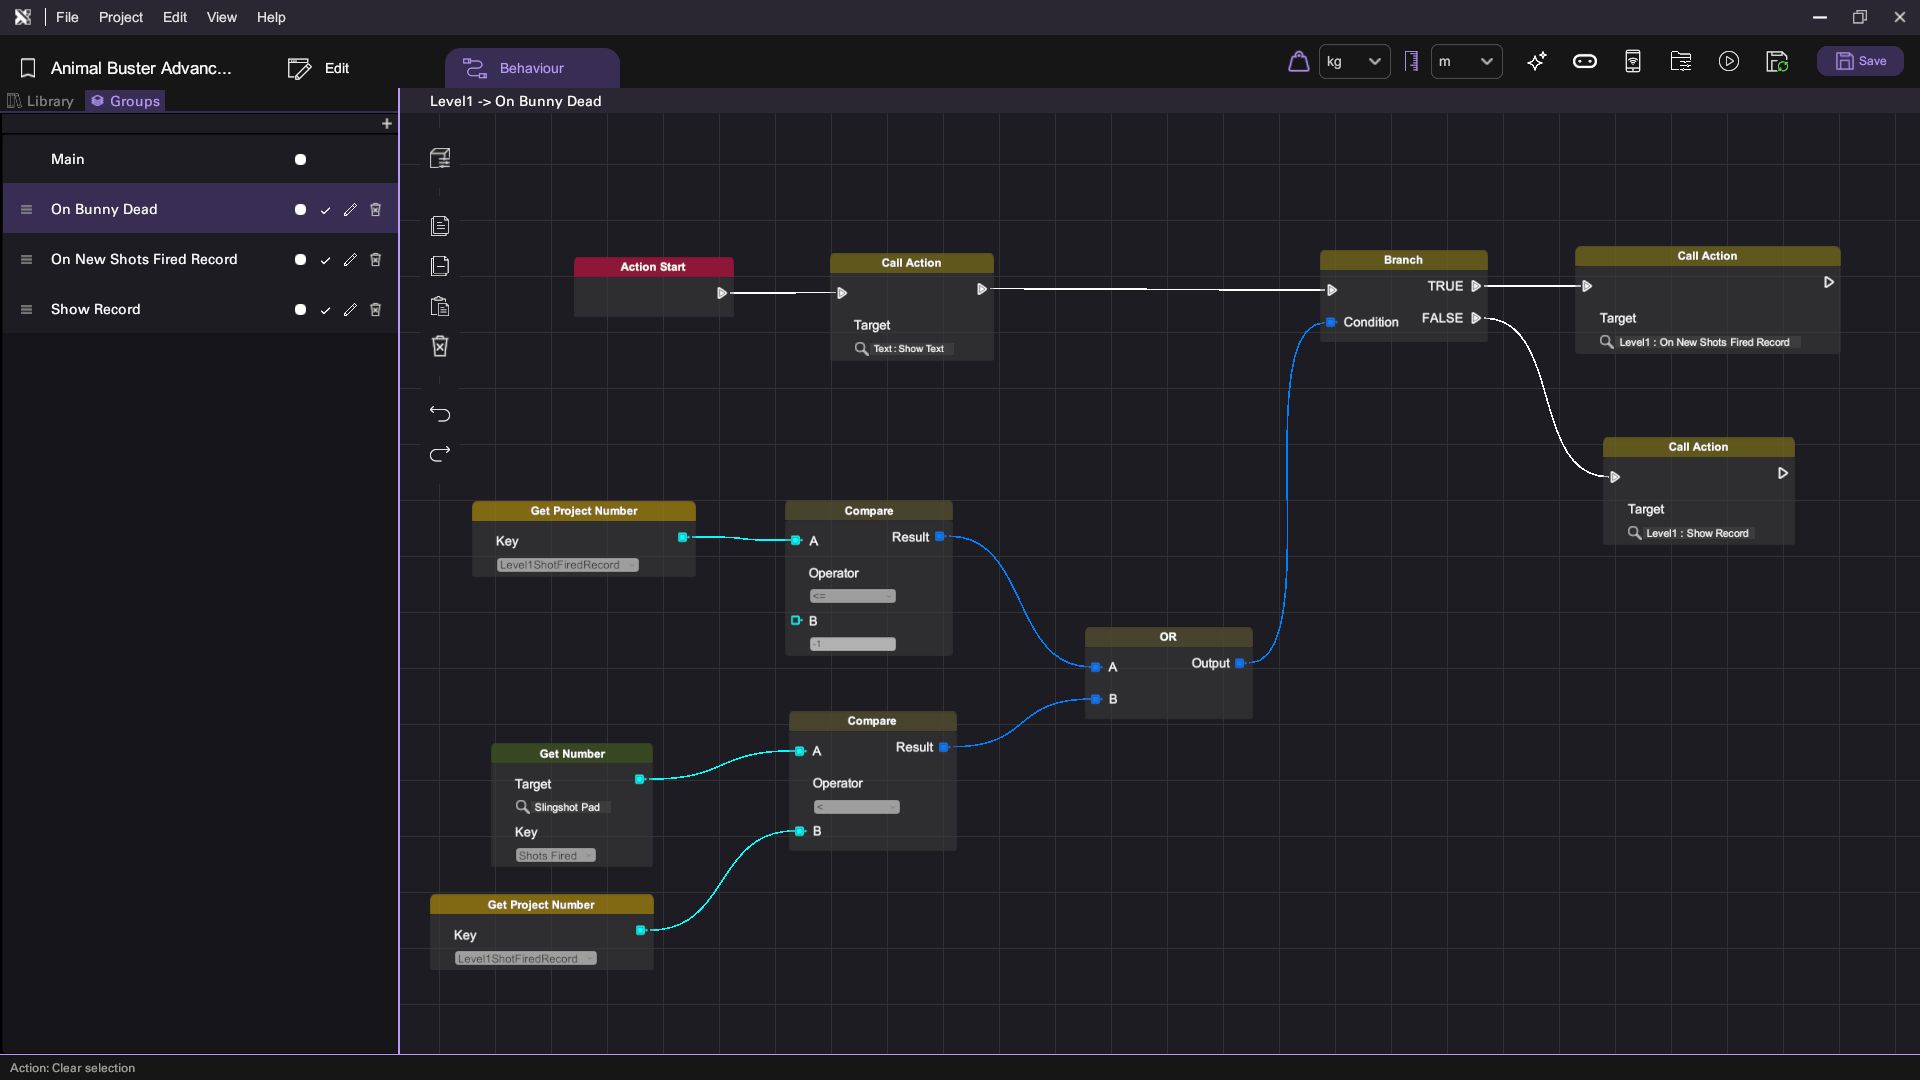
Here, we first show the text object displaying "Congratulations", which will also in turn show the Shots Fired Displayer as well. Next we compare the value of the project variable Level1ShotFiredRecord with the Shots Fired variable in the Slingshot Pad and call On New Shots Fired Record if Shots Fired is less than Level1ShotFiredRecord. Otherwise, Show Record will be called. If Level1ShotFiredRecord is -1, it means there wasn't a record set, so whatever score the player achieved would now be the new record.
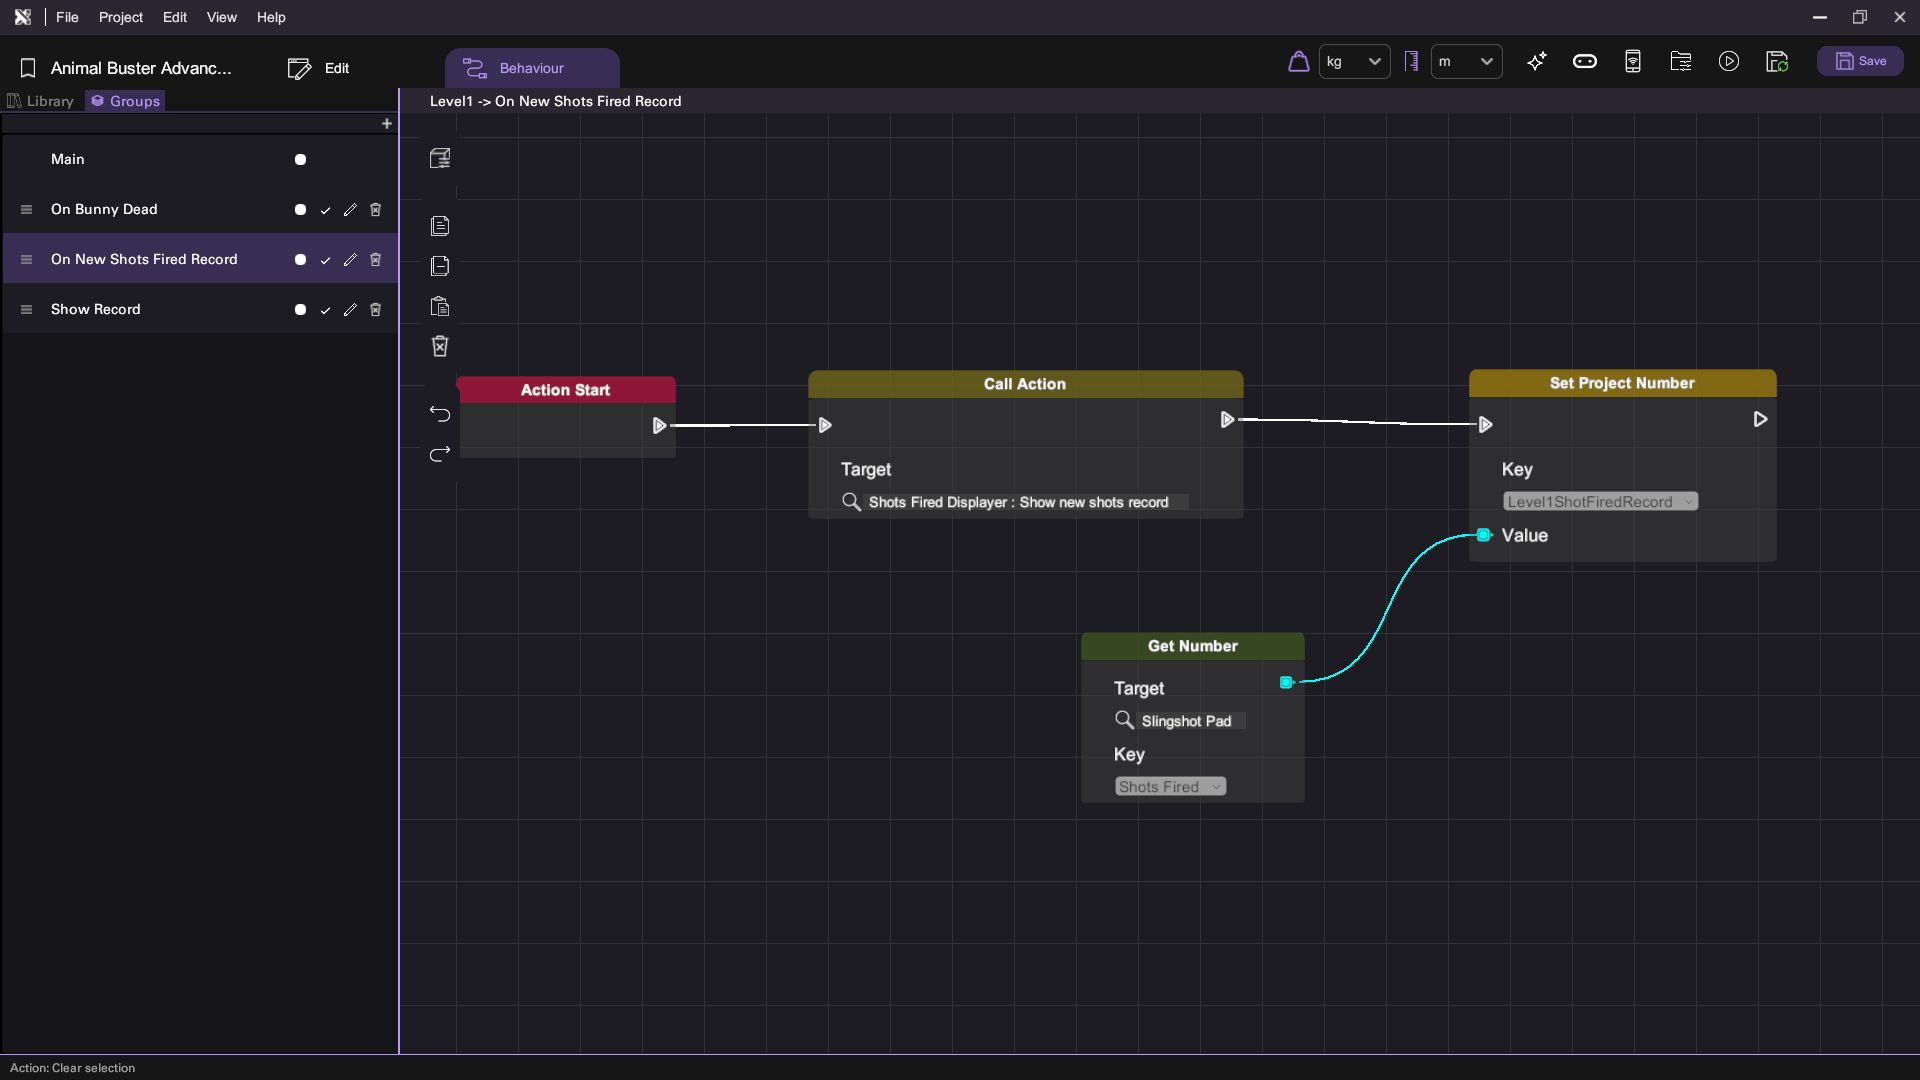
- Implement "On New Shots Fired Record" action:
- In the groups tab, select On New Shots Fired Record
- Call the Show new shots record action in the Shots Fired Displayer object
- Assign the value in Shots Fired from the Slingshot Pad object to the Level1ShotFiredRecord project variable.
| Category | Behaviour |
|---|---|
|  |
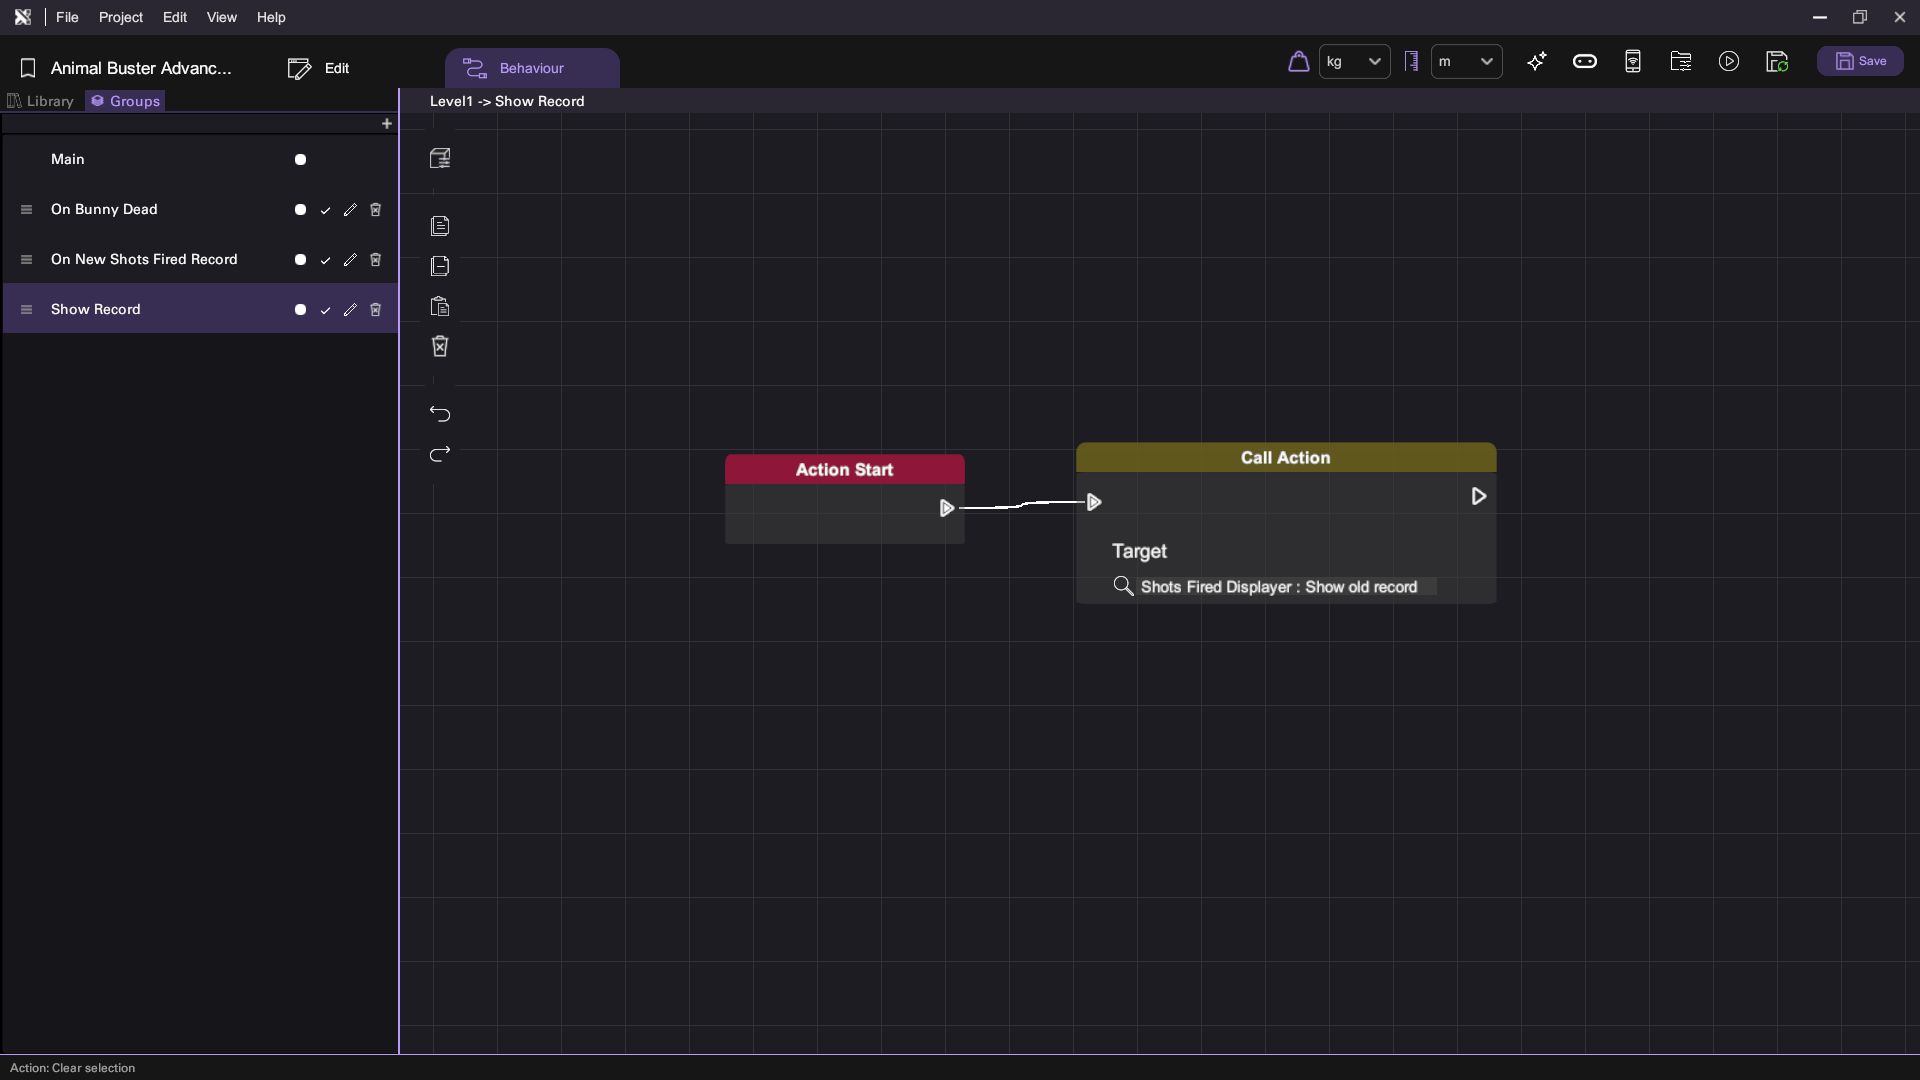
- Implement "Show Record" action:
- In the groups tab, select Show Record
- Here, we will just simply call the Show old record action in the Shots Fired Displayer object.
Step 5: Make the Bunny Call the "On Bunny Dead" action
Finally, we need to modify the behaviour of the bunny so that it will actually call the On Bunny Dead scene action.
- Select the Enemy object and go into the behaviour tab.
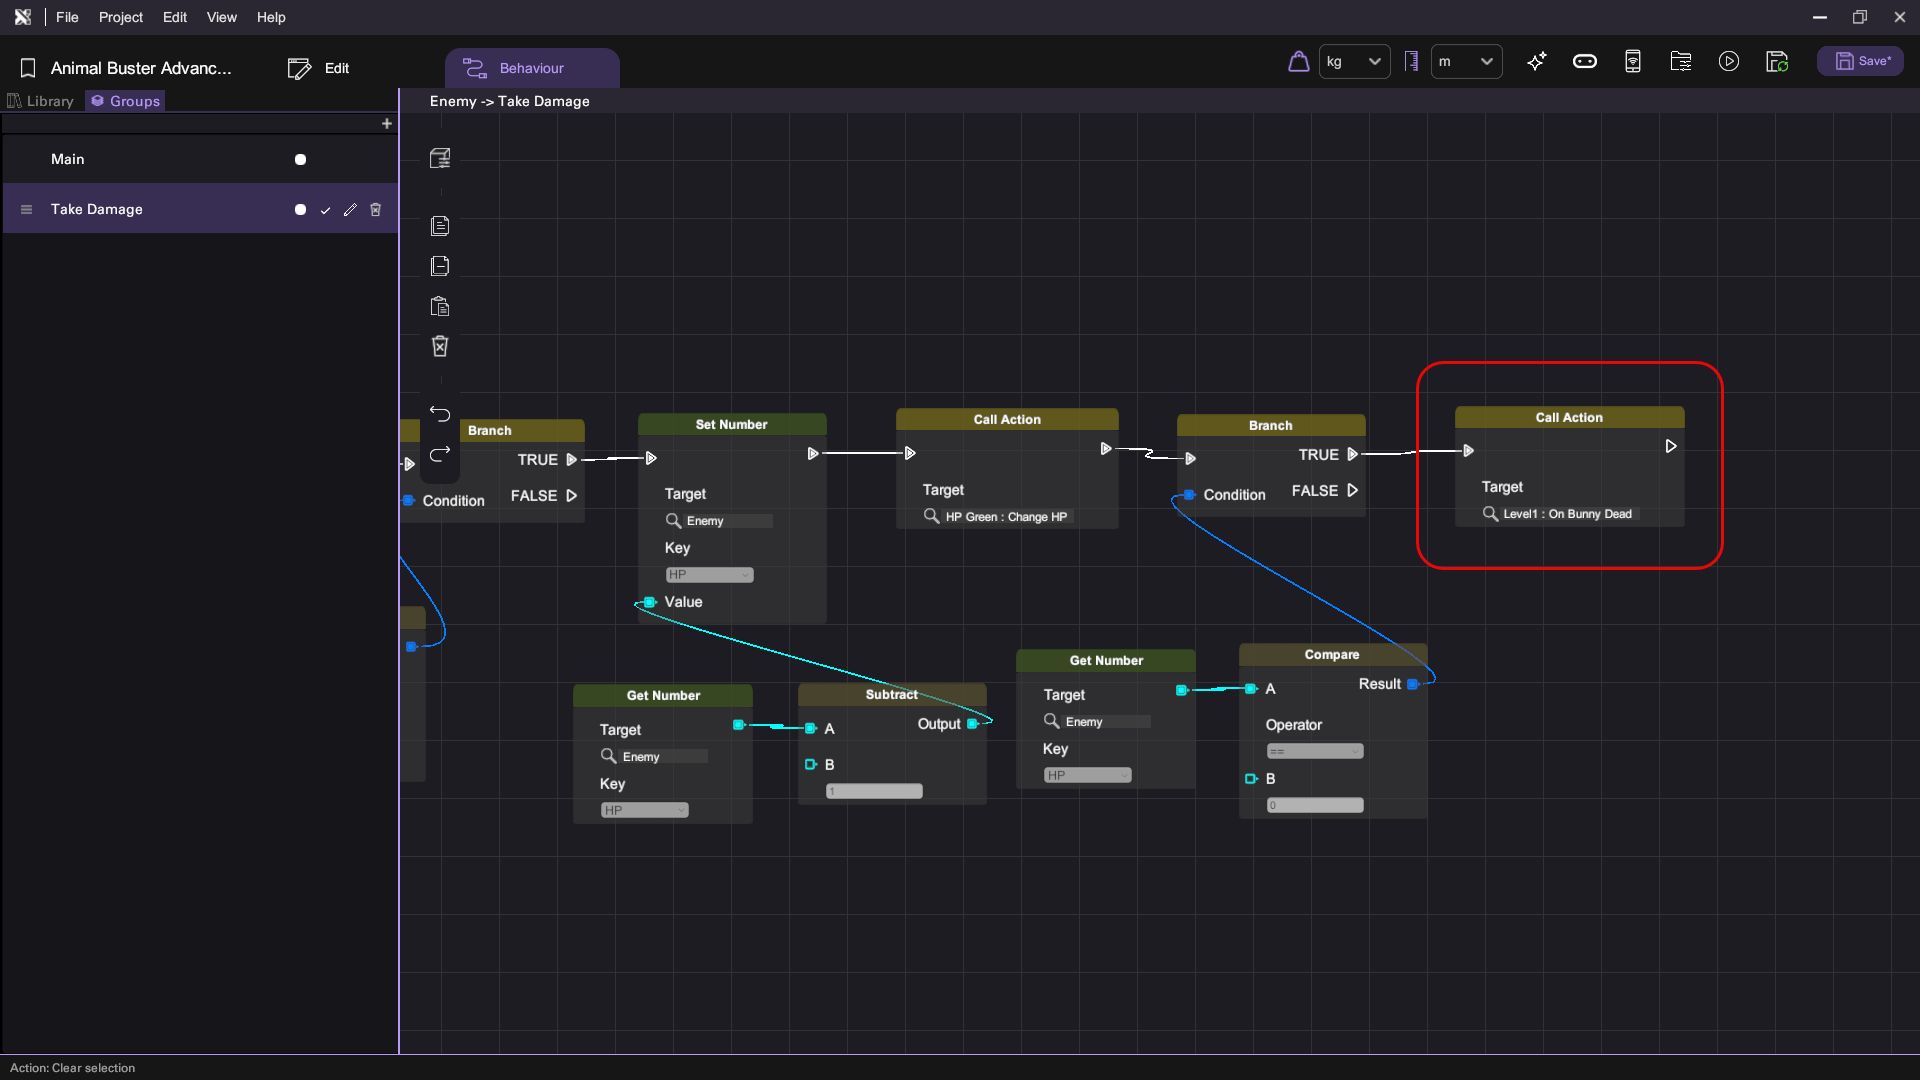
- Go to the groups tab and select the Take Damage action.
- In the Take Damage action, the final branch checks whether the bunny's HP has reached 0, and will proceed to show the Text object displaying "Congratulations" if it has. Replace the call to display the text object with a Call Action node calling the On Bunny Dead scene action.
Step 6: Reloading the Scene
To see project variables in action, we would need a mechanism to load and unload scenes. For simplicity, we will create a button that will reload the current scene when clicked. The button will be shown once the player successfully kills the bunny.
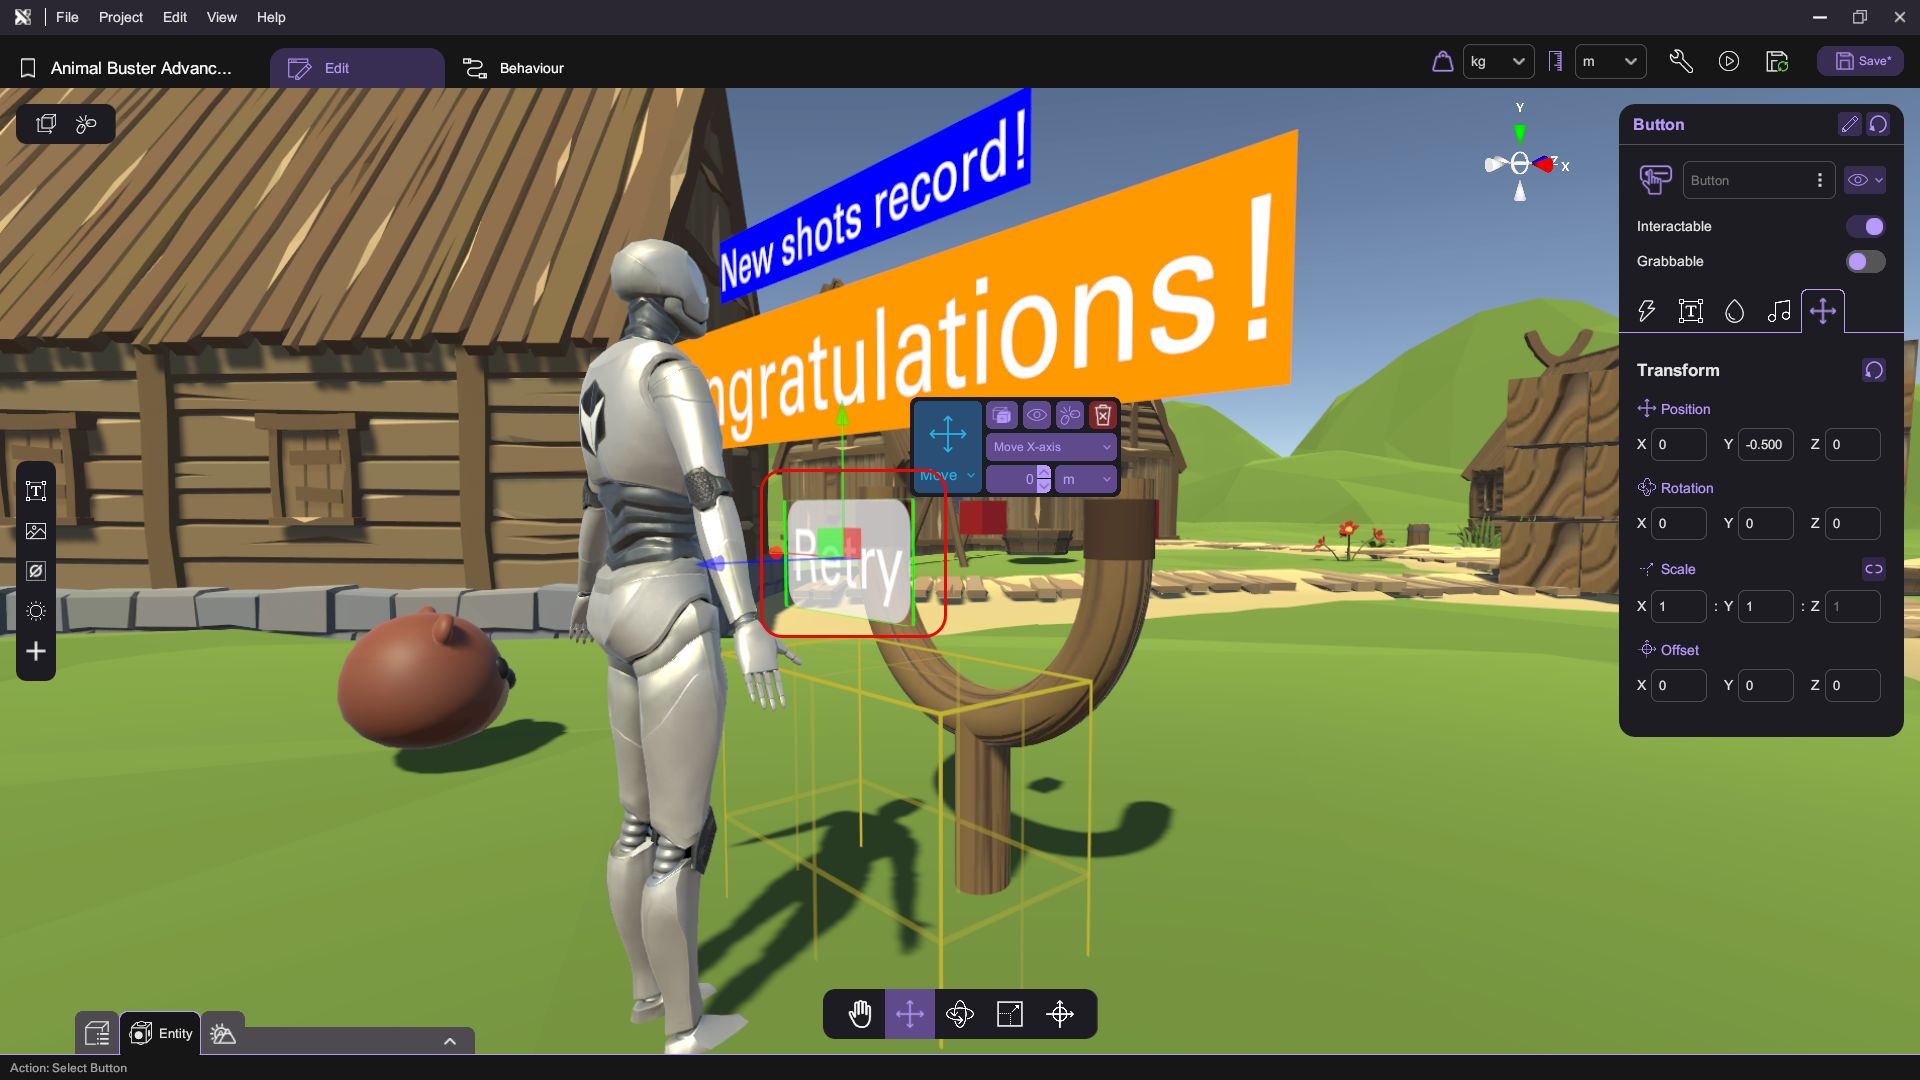
- Create the button:
- Create a new Button object.
- Link it to the Text object displaying the text "Congratulations".
- Set its position to be 0, -0.5, 0.
- Set its rotation to be 0, 0, 0.
- Set its text to be "Retry" and its font size to be 20.
- Set the background color of the button to be a color of your choice.
- Implement the button's behaviour:
- With the button selected, go into the behaviour tab.
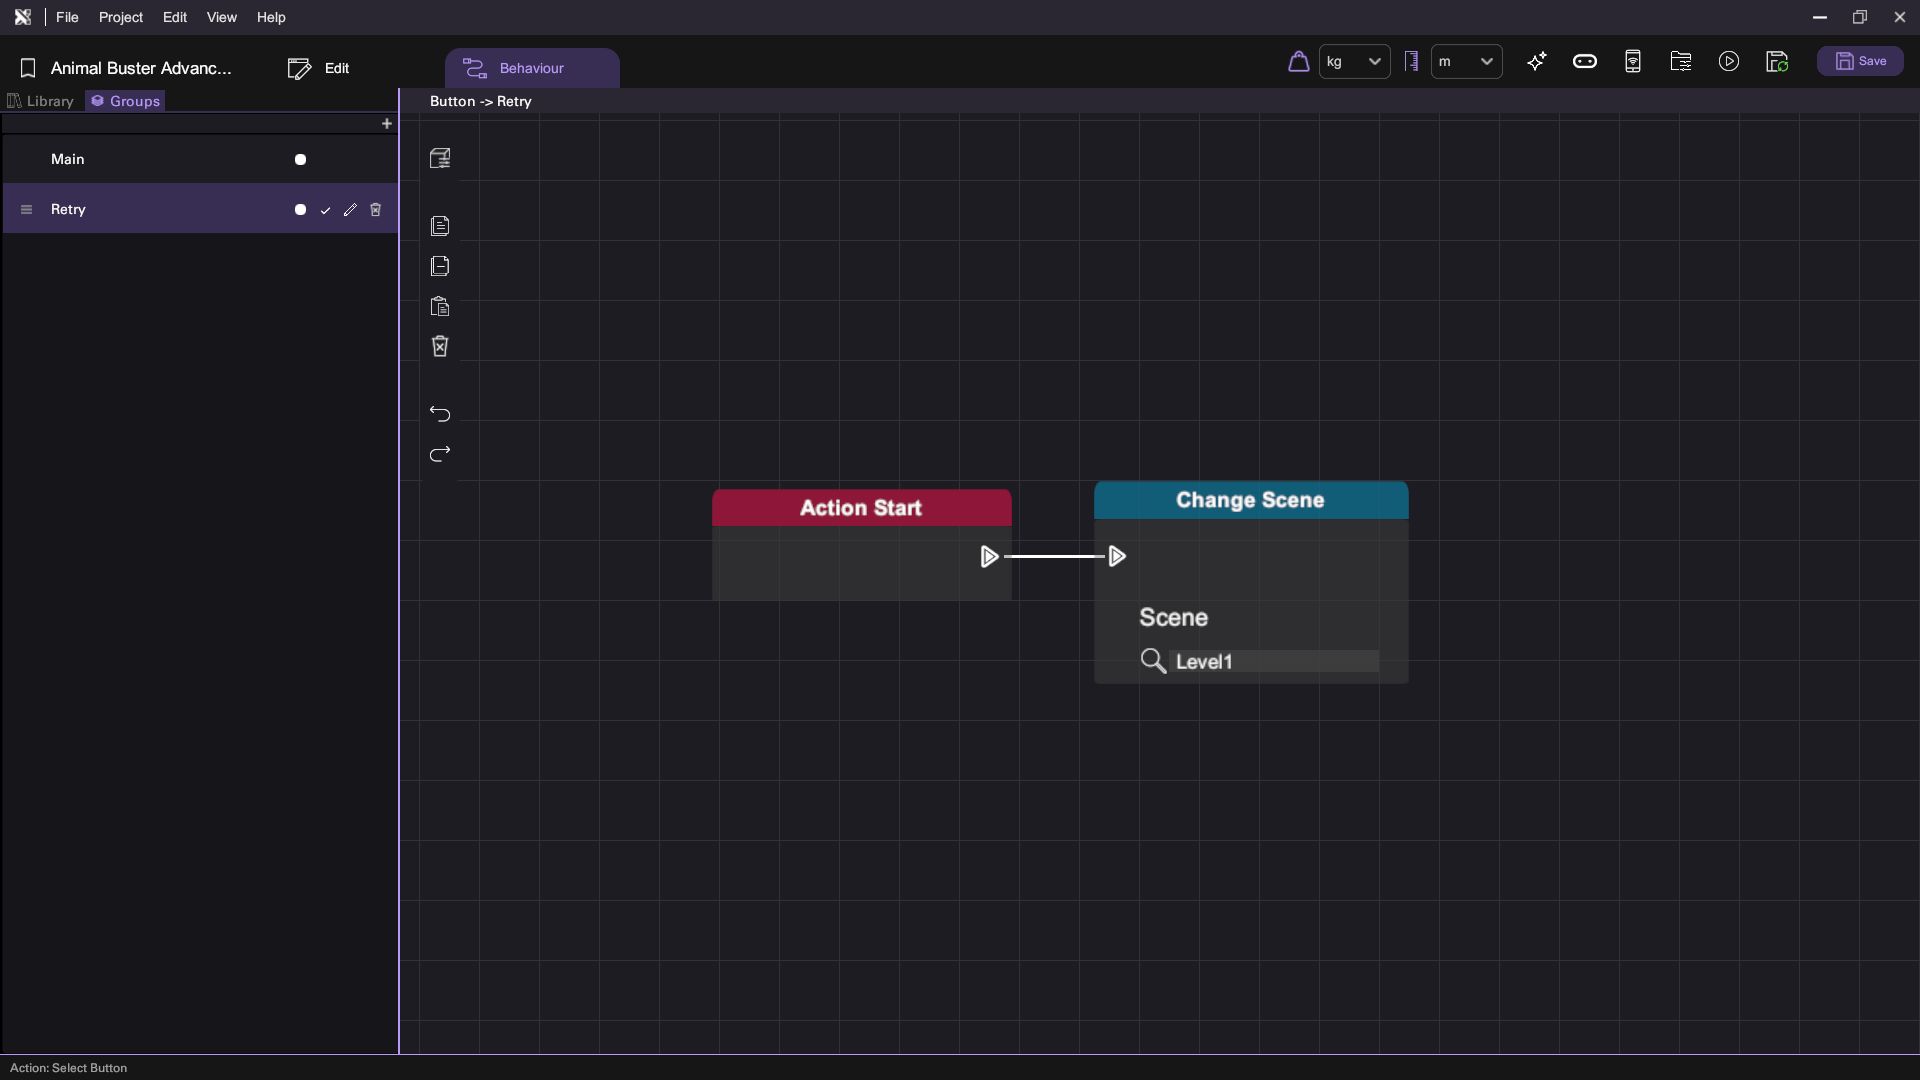
- In the groups tab, create a new action called Retry.
- When the action is called, have it reload the current scene, an example implementation is shown below.
- Assign the Retry action to the button:
- Go back to the edit tab.
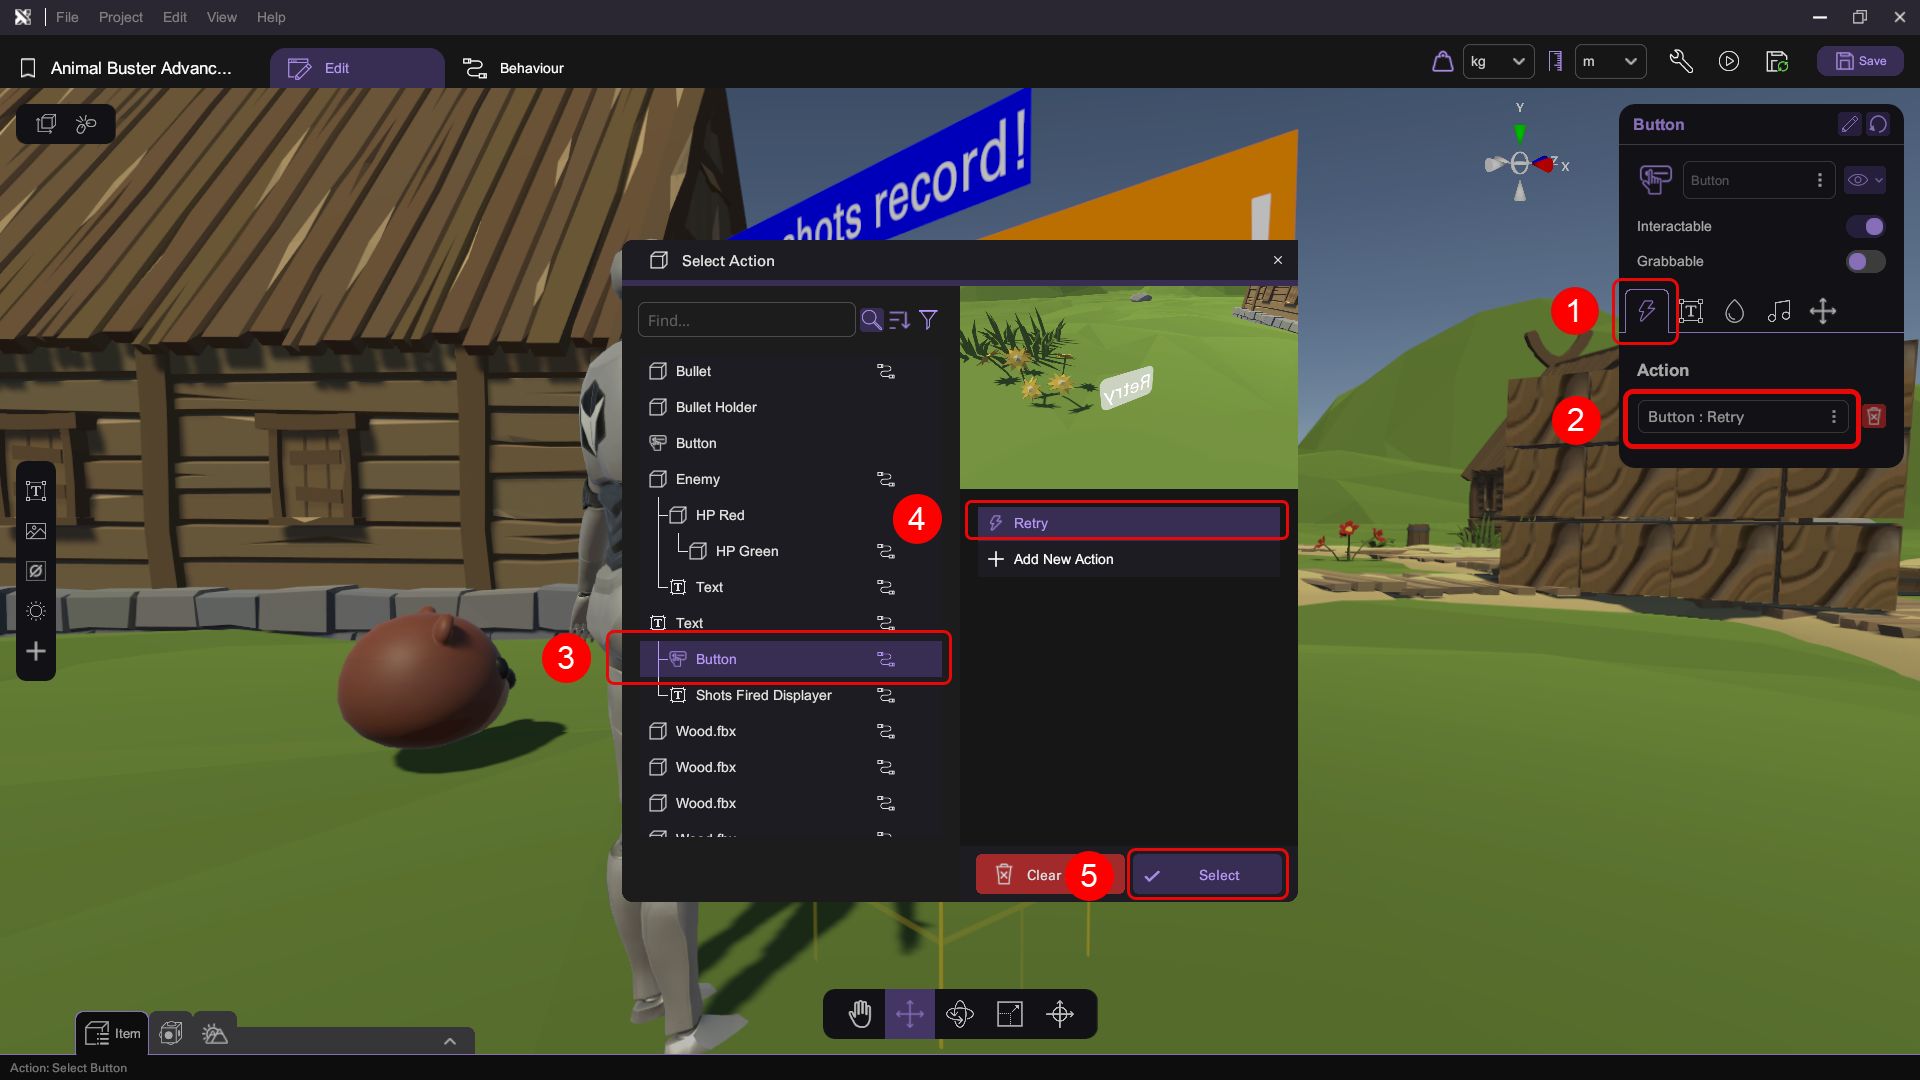
- With the button selected, go into the inspector and click on the action tab.
- Select the Retry action from the button as shown below.
Step 7: Testing
Finally, enter play mode and play the game you made.
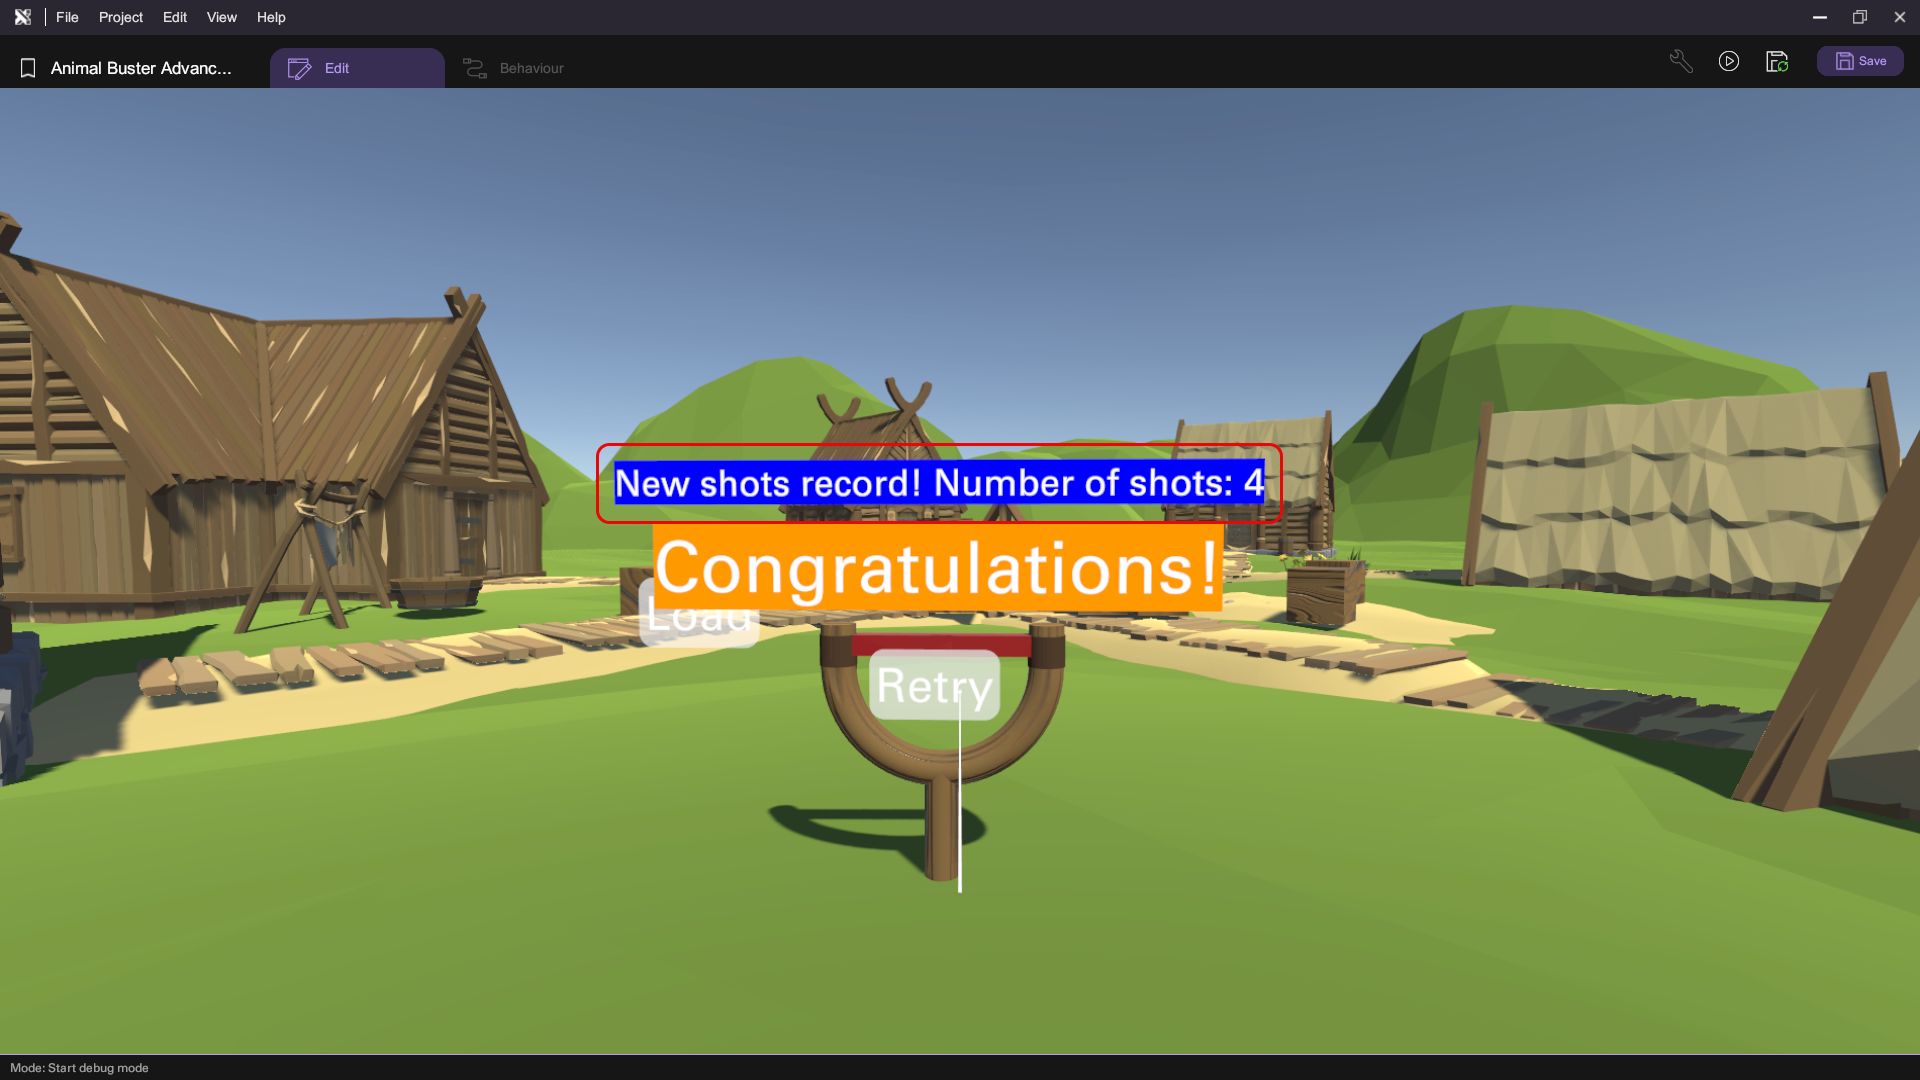
In your first playthrough, you should get something like this after killing the bunny.
Click the retry button and play the game again, this time however, purposely use more shots than you did in the first playthrough. Once you have killed the bunny, notice how the Shots Fired Displayer displays the number of shots you used in your last playthrough and your current playthrough correctly.
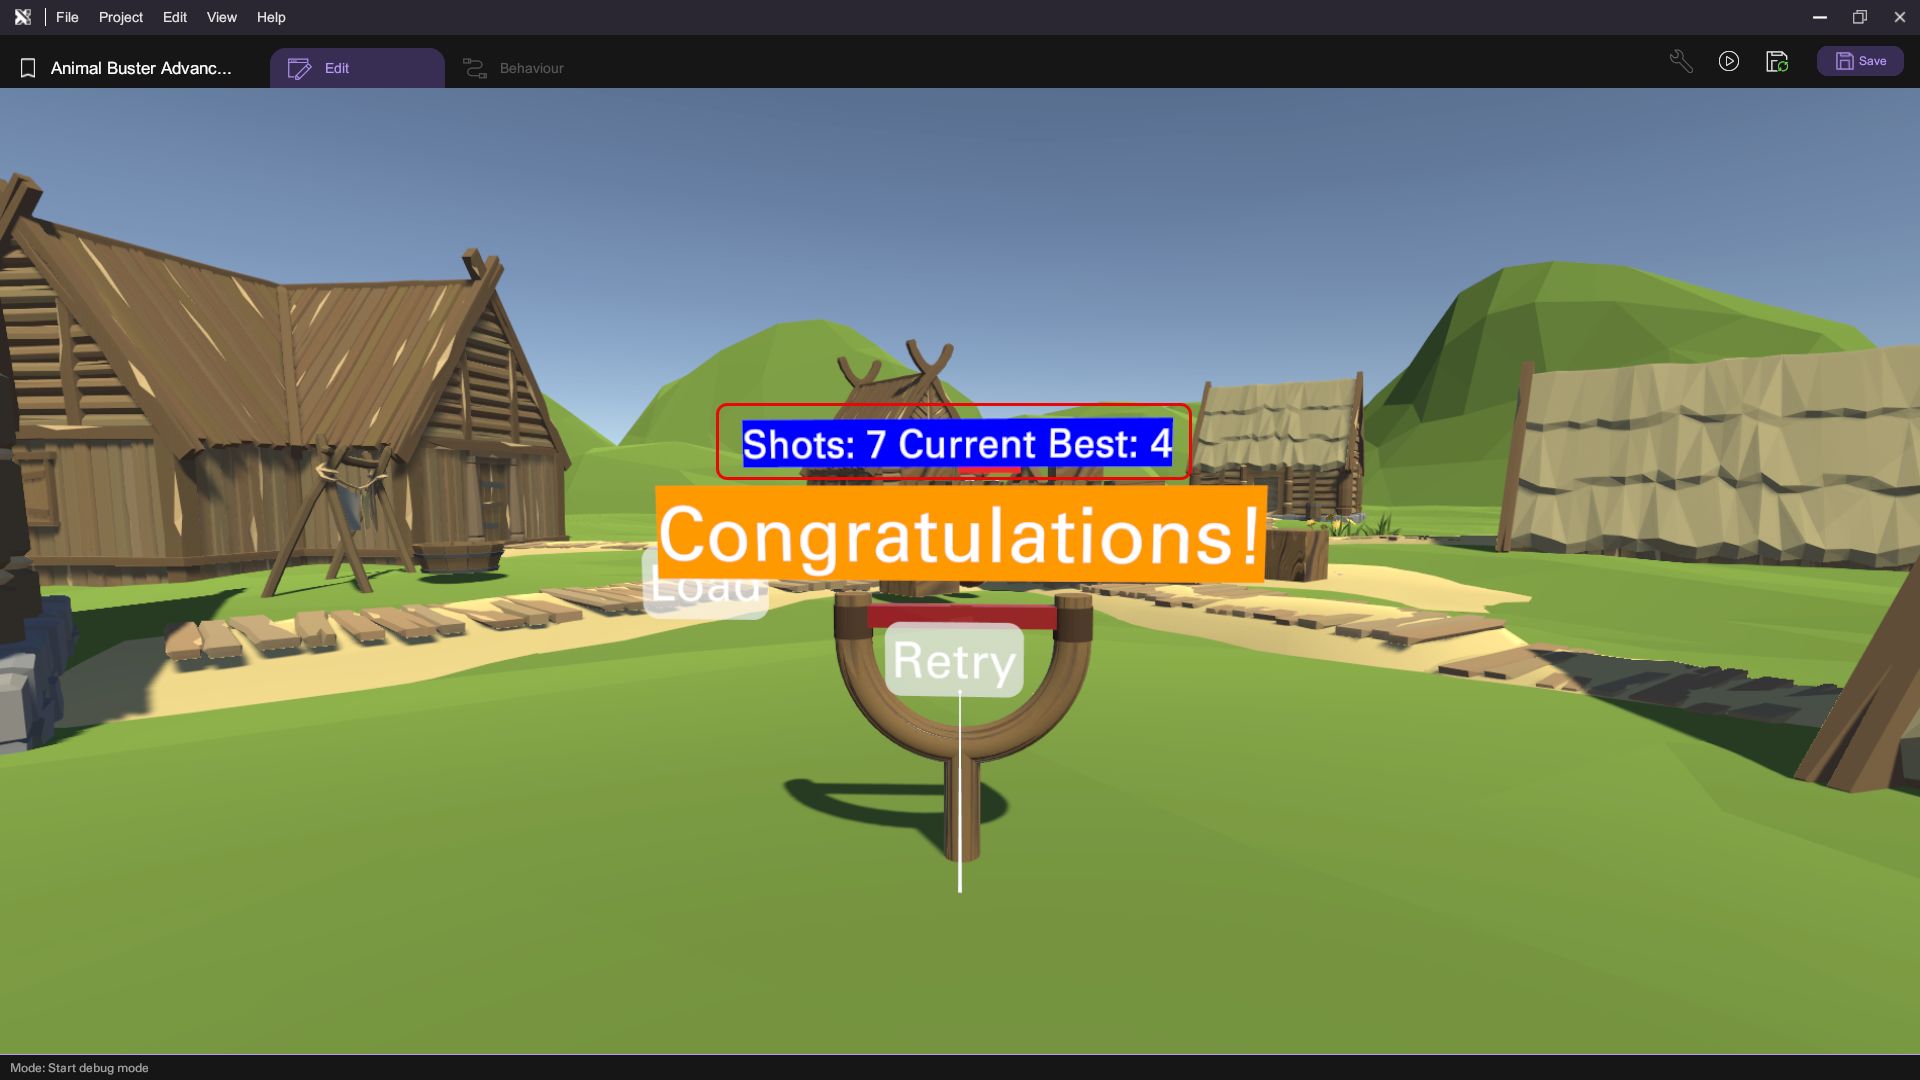
This is because, the Shots fired variable in the Slingshot Pad object got reset to 0, while the Level1ShotFiredRecord project variable retained its previously assigned value. Whenever a scene is unloaded, the value of all scene variables and item variables get reset, whereas the value of all project variables stay the same.
You can also play the game again and attempt to beat your previous record to verify that the game is capable of changing the value of the Level1ShotFiredRecord project variable, whenever a new record is achieved.
Conclusion
Congratulations! You have successfully created a playable prototype of AnimalBuster and learned about Project Variables. As a challenge, you can create new AnimalBuster levels on your own using everything you have learnt throughout this series. You can also replace the Retry button mentioned earlier with a Next Level button that will load the additional levels you have created! Stay tuned for more tutorials!